Your KitchenAid stand mixer is an indispensable ally in the kitchen, a powerful workhorse that simplifies everything from kneading dough to whipping meringues. But like any precision machine, it thrives on proper care and maintenance. Over time, the internal grease that lubricates its vital gears can break down, dry out, or even leak, leading to noisy operation, decreased efficiency, and potential damage. This comprehensive guide will walk you through the essential process of regreasing your KitchenAid stand mixer, ensuring it continues to perform flawlessly for years to come. Maintaining your mixer’s internal health is key to its longevity and your culinary success.
Understanding Your KitchenAid Stand Mixer’s Internal Mechanics
A KitchenAid stand mixer operates through a complex system of interlocking gears, precisely engineered to deliver power and rotation to the attachments. These gears are housed within a gearbox, packed with a specialized food-grade grease that reduces friction, absorbs shock, and keeps the metal components moving smoothly. This internal lubrication is critical for the mixer’s quiet operation and efficient power transfer.
Why Regular Regreasing is Crucial
|
Our Picks for the Best Stand Mixer in 2026
As an Amazon Associate I earn from qualifying purchases.
|
||
| Num | Product | Action |
|---|---|---|
| 1 | Hamilton Beach Electric Stand Mixer, 4 Quarts, Dough Hook, Flat Beater Attachments, Splash Guard, 7 Speeds with Whisk, Easy-Carry Top Handle, Aqua |

|
| 2 | Hamilton Beach Electric Stand Mixer, 4 Quarts, Dough Hook, Flat Beater Attachments, Splash Guard, 7 Speeds with Whisk, Easy-Carry Top Handle, Blue |
|
| 3 | Cuisinart Stand Mixer, 12 Speed, 5.5 Quart Stainless Steel Bowl, Chef’s Whisk, Mixing Paddle, Dough Hook, Splash Guard w/ Pour Spout, Periwinkle Blue, SM-50TQNAS |
|
| 4 | Mini Angel Stand Mixer,10-Speed 5QT Kitchen Electric Mixer,Tilt-Head Food Mixer with Dough Hook, Wire Whisk, Flat Beater, Stainless Steel Bowl (Silver) |
|
| 5 | Stand Mixer, 9-Quart Stainless Steel Bowl, 660W Professional Power, Multiple Speed Options, Sturdy Design, Easy to Clean, Lifetime Support, SM-1550(Caramel) |
|
| 6 | Stand Mixer, 6 QT 600W Tilt-Head Dough Mixer, 6+P speed Mixers Kitchen Electric Stand Mixer with Stainless Steel Bowl, Dishwasher-Safe Dough Hook, Flat Beater, Wire Whisk, Splash Guard, Grey |
|
| 7 | Stand Mixer, 6QT Electric Kitchen Mixer for Baking Cakes & Dough, LED Smart Touchscreen, 11-Speed Tilt-Head & Timer, 4 Presets, Mixer with Bowl, Dough Hook/Whisk/Beater, Green |
|
| 8 | 3-IN-1 Electric Stand Mixer, 6.5QT Bowl 660W 10-Speed Kitchen Mixer, Household Food Mixers include Dough Hook, Beater and Whisk, Bread Cake Mixer for Baking and Most Home Cooks, Green |
|
| 9 | Stand Mixer, 6.5QT 10-Speed Tilt-Head Electric Stand Mixer, 3-In-1 Kitchen Mixer with Bowl, Dough Hook, Whisk and Beater, Food Mixer for Baking, Cake and Most Home Cooks, Pink |
|
| 10 | 8.45 QT All Metal Stand Mixer,10 Speed Large Capacity Kitchen Mixer with Digital Timer & Tilt-Head, Electric Mixer with Whisk Dough Hook Mixing Beater for Baking,Cakes,Cookie,Bread,Salad(Silver) |
|
The grease within your mixer is not designed to last forever. Over years of use, especially with heavy loads or frequent operation, the grease can harden, separate, or become contaminated with tiny metal shavings from normal wear and tear. When the grease degrades, it loses its lubricating properties, causing increased friction between gears. This friction leads to excessive heat, grinding noises, and accelerated wear on the components. Regular regreasing replaces this spent lubricant with fresh, effective grease, preventing premature failure and maintaining the mixer’s optimal performance.
Signs Your Mixer Needs Regreasing
Your KitchenAid mixer will often give you clear indications when its internal grease needs attention. The most common sign is the appearance of oil leaking from the mixer head or planetary hub. This usually indicates that the grease has separated, with the oil component escaping the gearbox. Another tell-tale sign is an increase in operational noise; if your mixer sounds louder or makes grinding, squealing, or clunking sounds, it’s likely due to dry or degraded grease. Finally, if your mixer has been unused for an extended period, the grease might have settled and hardened, making a regrease advisable before resuming regular use.
Essential Tools and Materials for the Job
Before you begin the regreasing process, gathering the right tools and materials is crucial for a smooth and successful operation. Having everything ready beforehand saves time and ensures you can complete each step without interruption.
Recommended Grease Types
The most critical material for this task is the correct type of grease. It is imperative to use an NSF H-1 Registered Food-Grade Grease with an NLGI #2 viscosity. This specification ensures that the grease is safe for incidental food contact, as it is used in equipment where food processing occurs. Do not use automotive or general-purpose grease, as these are not food-safe and can contaminate your food. Many manufacturers, including KitchenAid, offer their own OEM food-grade grease. Popular alternatives that meet these specifications include products like Super Lube 41160 or 41150. Always verify the NSF H-1 and NLGI #2 ratings before purchasing.
Safety Precautions Before You Begin
Safety should always be your top priority when working with electrical appliances. Always begin by unplugging your KitchenAid stand mixer from the power outlet. This eliminates any risk of electrical shock during disassembly. Prepare a clean, sturdy workspace, ideally protected by an old towel or mat to catch any grease, screws, or small parts. Organize your tools within easy reach and ensure adequate lighting. If you have a tilt-head model, tilt the head back and lock it in place. For bowl-lift models, lower and remove the bowl.
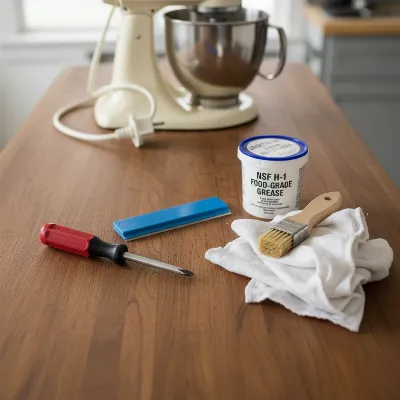 Essential tools and food-grade grease for KitchenAid stand mixer maintenance
Step-by-Step Guide to Regreasing Your KitchenAid Stand Mixer
Regreasing your KitchenAid stand mixer involves a careful process of disassembly, cleaning, re-lubrication, and reassembly. Take your time with each step to ensure proper execution.
Disassembly: Opening Up Your Mixer
Start by removing the rear cover of your mixer, typically secured by a couple of Phillips head screws. Next, remove the screws around the perimeter of the top motor housing or the metal strip that runs around the mixer head. You may also need to remove the planetary assembly. For this, turn the mixer upside down, locate the retaining pin that holds the planetary hub in place, and gently pry it out with a small flathead screwdriver. Once the pin is removed, the planetary assembly should slide off the shaft. Finally, carefully separate the top and bottom halves of the mixer head to expose the gearbox and internal gears. This often involves removing additional screws and gently prying the halves apart.
Cleaning Out Old Grease and Debris
This is a critical step. Using a plastic scraper or putty knife, meticulously scrape out as much of the old, degraded grease as possible from the gearbox housing and off the gears. Wipe down the gears and the inside of the gearbox thoroughly with clean rags. For stubborn grease or to reach into crevices, a small brush or old toothbrush can be very effective. Be thorough, but avoid damaging any components. Inspect the gears for any signs of wear, such as chipped teeth or excessive pitting, and remove any metal shavings or hardened chunks of grease. The cleaner the gearbox, the better the new grease will perform. You may also want to inspect the gasket or O-rings for any damage or signs of wear, replacing them if necessary.
Applying New Grease to the Gears
Once the gearbox is spotless, it’s time to apply the fresh food-grade grease. Use your fingers (with gloves for cleanliness) or a small, clean spatula to generously apply the new grease to all the gears, shafts, and internal moving parts. Ensure that every tooth of every gear is thoroughly coated. Pack a healthy amount of grease into the hollow spaces around the gears, allowing it to naturally distribute during operation. Don’t be stingy with the grease; it’s better to use a generous amount to ensure full lubrication. Turn the gears manually as you apply the grease to ensure even coverage.
Reassembly: Putting It Back Together
Reassemble your mixer by reversing the disassembly steps. Carefully align the top and bottom halves of the mixer head, ensuring no wires are pinched. Secure all screws, starting with the gearbox cover, then reattach the planetary assembly by aligning it with the shaft and reinserting the retaining pin. Replace the top housing and finally the rear cover. Ensure all components are securely fastened. Once fully reassembled, plug in your mixer and test it at various speeds to confirm smooth and quiet operation. Listen for any unusual noises and observe its performance.
Maintaining Your KitchenAid Stand Mixer’s Longevity
Regular maintenance extends the life of your KitchenAid stand mixer and keeps it running optimally. Understanding how often to regrease and how to address common issues can save you time and money in the long run.
Frequency of Regreasing
While there’s no strict rule that applies to every user, a general recommendation is to regrease your KitchenAid stand mixer at least once a year for moderate to heavy users. For those who use their mixer less frequently, every two to three years might suffice, but it’s always wise to inspect for the signs mentioned earlier (leaking oil, increased noise) annually. If you use your mixer for very heavy-duty tasks, such as kneading stiff bread dough daily, you might consider more frequent checks or even bi-annual regreasing. Proactive maintenance is always better than waiting for a problem to arise.
Common Issues and Troubleshooting
Beyond regreasing, several other factors contribute to your mixer’s longevity. If, after regreasing, your mixer still makes unusual noises, it could indicate worn-out gears that need replacement. Loose screws or misaligned components during reassembly can also cause issues. Always ensure all screws are tightened appropriately and that components are correctly seated. If oil leakage persists after a thorough regrease, it might suggest a damaged gasket or seal, which would also need replacing. For persistent or complex issues, consulting a qualified appliance technician or KitchenAid service center is always a good idea.
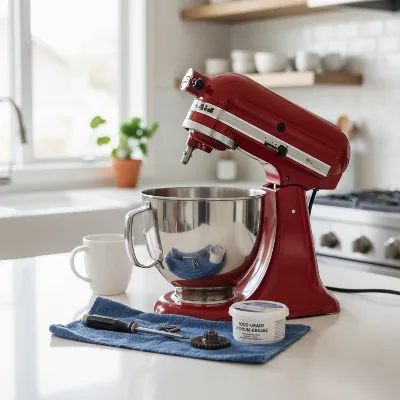 KitchenAid Stand Mixer being maintained for longevity with tools and clean workspace
Conclusion
Regreasing the gears of your KitchenAid stand mixer is a vital maintenance task that, while seemingly daunting, is a straightforward process once you understand the steps. By dedicating a little time and using the correct food-grade grease, you can significantly extend the life of your mixer, ensure its quiet and efficient operation, and prevent costly repairs down the line. Think of it as an essential tune-up that keeps your culinary companion performing at its peak. Regular care ensures your KitchenAid remains a trusted partner in your kitchen for many years to come, ready to tackle any recipe you throw its way. What will you create next with your perfectly maintained mixer?